

What You'll Need:
-driveway chalk (Crayola's brightly colored outdoor chalk works best)
-a canister of fine table salt (regular salt works, too, the fine salt just looks more like sand)
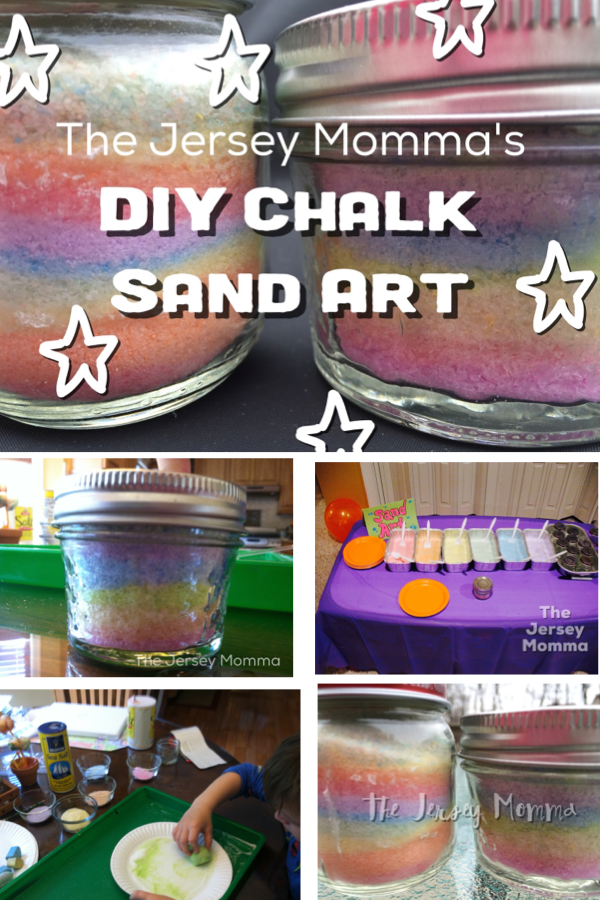
-small jars or bottles for your art (we used baby food jars)
You'll Also Need:
-paper plates or trays (to make the "sand" on)
-bowls to hold the colored sand
-small spoons or something to scoop the sand into your jars with
Step 1. Pour some salt onto a paper plate. Choose the color you want to make and roll the chalk in the salt until it starts picking up the color. You kind of have to do this over and over again until it becomes the shade/brightness you want it to. You can also kind of rub the chalk on the salt, too.
*TIP: If you are only making one jar, you can pour the plain salt into your jar first to see how much you'll need for the project. Then you'll know exactly how much to color

Step 2. As you finish each color, pour it into a little bowl and set it aside (*Jersey Momma tip: you see that green tray we're using? That was a gift from my art teacher sister. One of the BEST gifts we have ever received! We use it for Play-Doh, painting, messy crafts, etc. Easily wipes clean and can be used again and again!!). Amazon sells some similar ones and you can find them through my affiliate link here.
The colors came out beautiful- sweet shades of pastel. Nothing like those cool neon shades you see at sand art tables at state fairs or whatever, but hey, this was for a preschool party, and it was CHEAP!
 |
| Nothing like a blurry, unprofessional photo to add to a blog post! Oh well, I'm a momma, not a photographer! |
Step 3. Use small spoons to scoop the "sand" into your jar. The Jersey Momma's Boy opted for a layered rainbow look, but you can do any color combination you want. We kept the jar on a paper plate each time, so that if any "sand" spilled, we could just pour it back into the bowl when we were done. You can also save any unused "sand" in Ziplocs to use again.
 |
| DIY Chalk Sand Art in a small jelly jar |


For the Party:
For the Art Party, we wound up using baby food jars (I actually bought the baby food in bulk on sale and washed each jar out. Then I pre-labeled each child's jar -on the lid- with their name).
We separated the colors in small cake tins and used plastic spoons for scooping. Guests also received a small plate to work over.

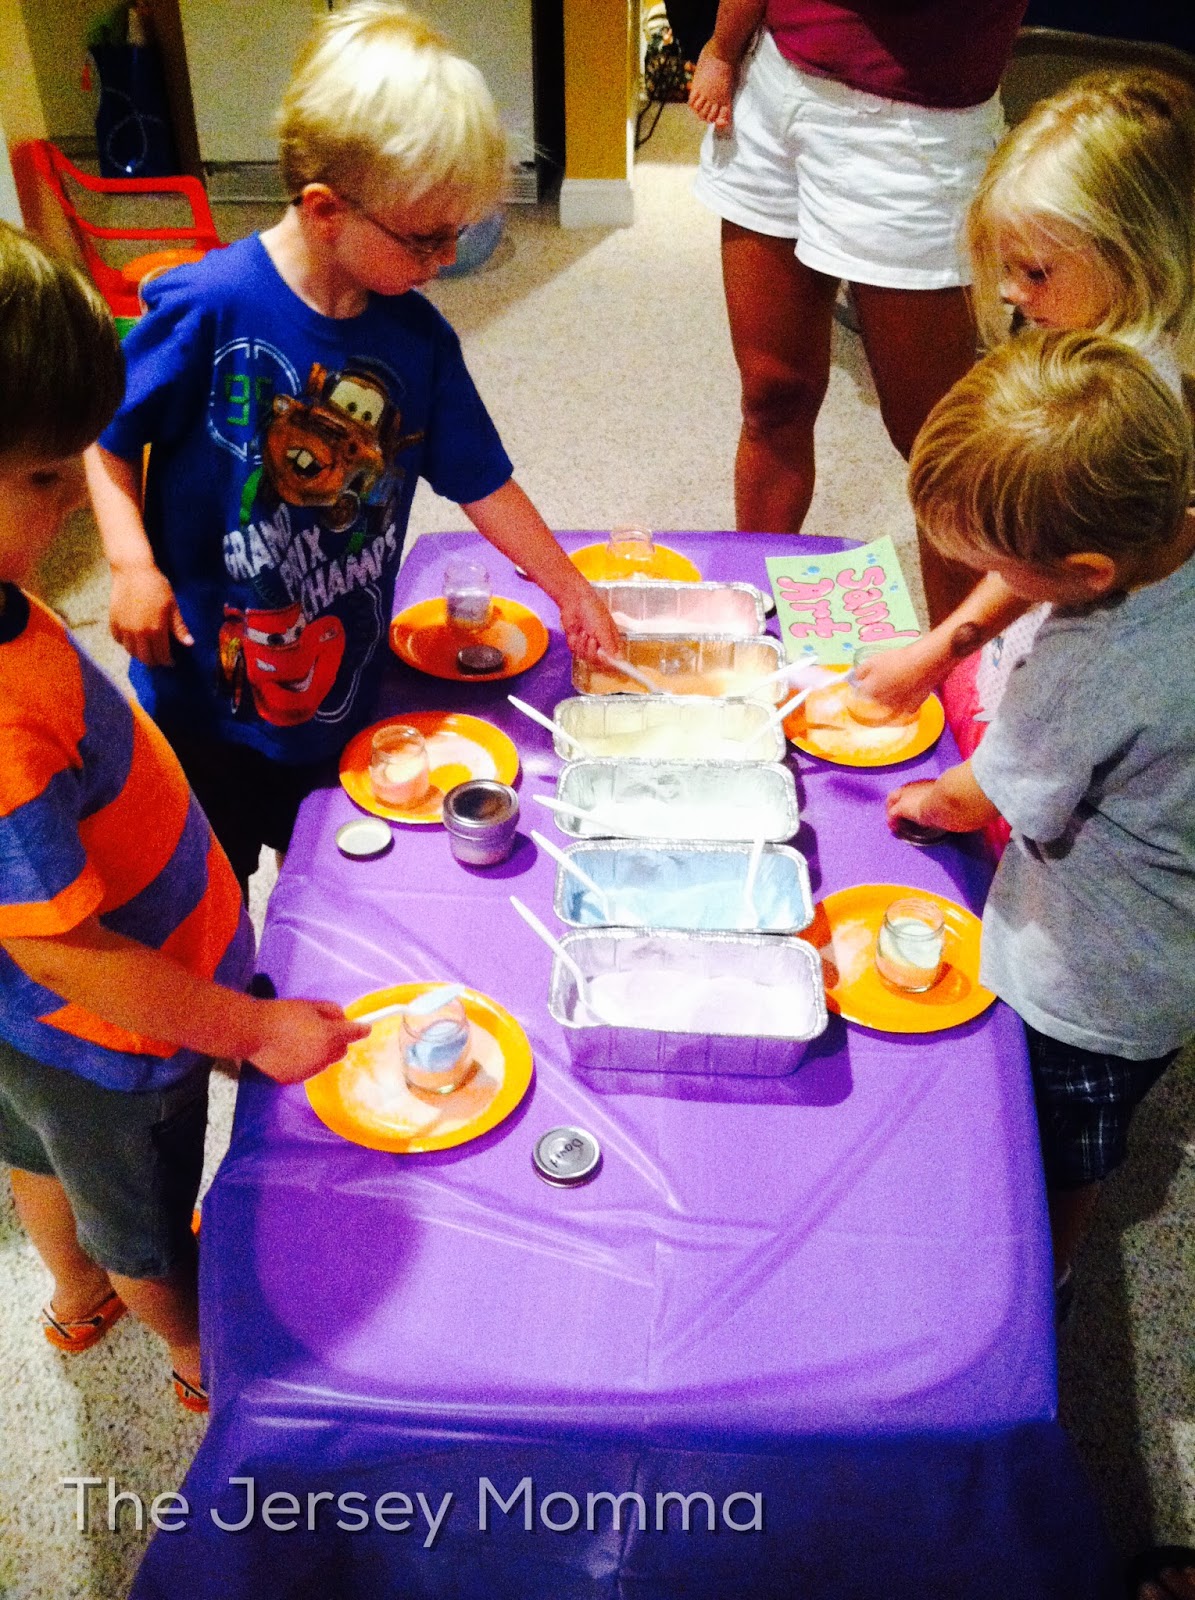
But don't think you need a party to make this cool sand art! This is an easy rainy day activity if you're looking for something to do with your little ones. My son didn't need much guidance, and I was able to do some chores around the kitchen as he sat and did this at the table. They make cute gifts, too. (Can you say "end of year teacher gift?" Include a little card with how it was made and your child's teacher will be all smiles!!)

Things to Note:
People have asked me for an exact ratio and how much salt I used for the party. It all depends on how big your jars are and how many you are making. I knew roughly how much salt one jar held, so I just tried to multiply that for the party. I bought three or four containers of salt and only used one small box of chalk. Our chalk did get kind of beat up from all of the salt rolling, but it was still usable for the driveway, just a little smaller.
Here are my Amazon affiliate links for DIY Chalk Sand Art supplies!


.jpg)


Another tip when doing this project is to completely fill your bottle of choice with salt first, then split it up and color it however you want. This way you'll know exactly how much "sand" to make for your project.
ReplyDeleteVery cool. I have one home sick today so we'll give this a try.
ReplyDeleteThat's a really neat idea.
ReplyDeleteThese turned out great! I never knew how to make chalk sand art.
ReplyDeleteThis is very cool! Awesome!
ReplyDeleteLove this! Thanks for sharing with the Frugal Family linky.
ReplyDeleteThanks for offering the link up, Laura! I appreciate you visiting.
DeleteThank you for sharing on #frugalfamilylinky last week - your post was featured this week on Peakle Pie! Don't forget to grab your badge and hope to see you linking up again soon!
ReplyDeleteThank you so much!! Very exciting. I will definitely check it out and grab my badge. Thanks for stopping by!
Delete